This post covers my investigation into using the Azure Developer CLI. Before writing this post I had no knowledge of what the Azure Developer CLI was or what it was used for. Basically I followed the information in this post and other pages linked to it to come up with the information in this post.
Installing the Azure Developer CLI
You can find out how to install it here:
Install or update the Azure Developer CLI
I installed in on my Windows box:
winget install microsoft.azd
Why Would I use the Azure Developer CLI
If you are not skilled up on Azure Architecture and Best Practices it seems like the Azure Developer CLI is built with you in mind. Using an Azure Developer CLI template, you can use the Azure Developer CLI to create and deploy applications to the Azure Cloud.
These templates adhere to best practices and take care of things like:
- The infrastructure that your application requires - using Bicep or Terraform
- Your application code
- A database if you need it
- Other resources such as Azure Storage Accounts or Azure Key Vaults or any Azure resources that you may need if there is a template for it. (Note: you can also create your own templates)
Although I would not use this myself without understanding every file that I am deploying, I could use it for the following reasons:
- Quickly deploy something I am not familiar with such as a React Website with a database and then learn from what I have done to increase my React skills. (Note: I am not a front end developer)
- I could use this template and replace the front end and database schema with my own requirements and probably save myself days if not weeks!
- Quickly deploy a proof of concept for a client
- Learn about the Azure Developer CLI which I am doing here
Azure Developer CLI templates
There are many open source templates available that are written by Microsoft and other developers. To see the available templates you can look at this link Azure Developer CLI templates. There is also a list of open source templates here https://azure.github.io/awesome-azd/
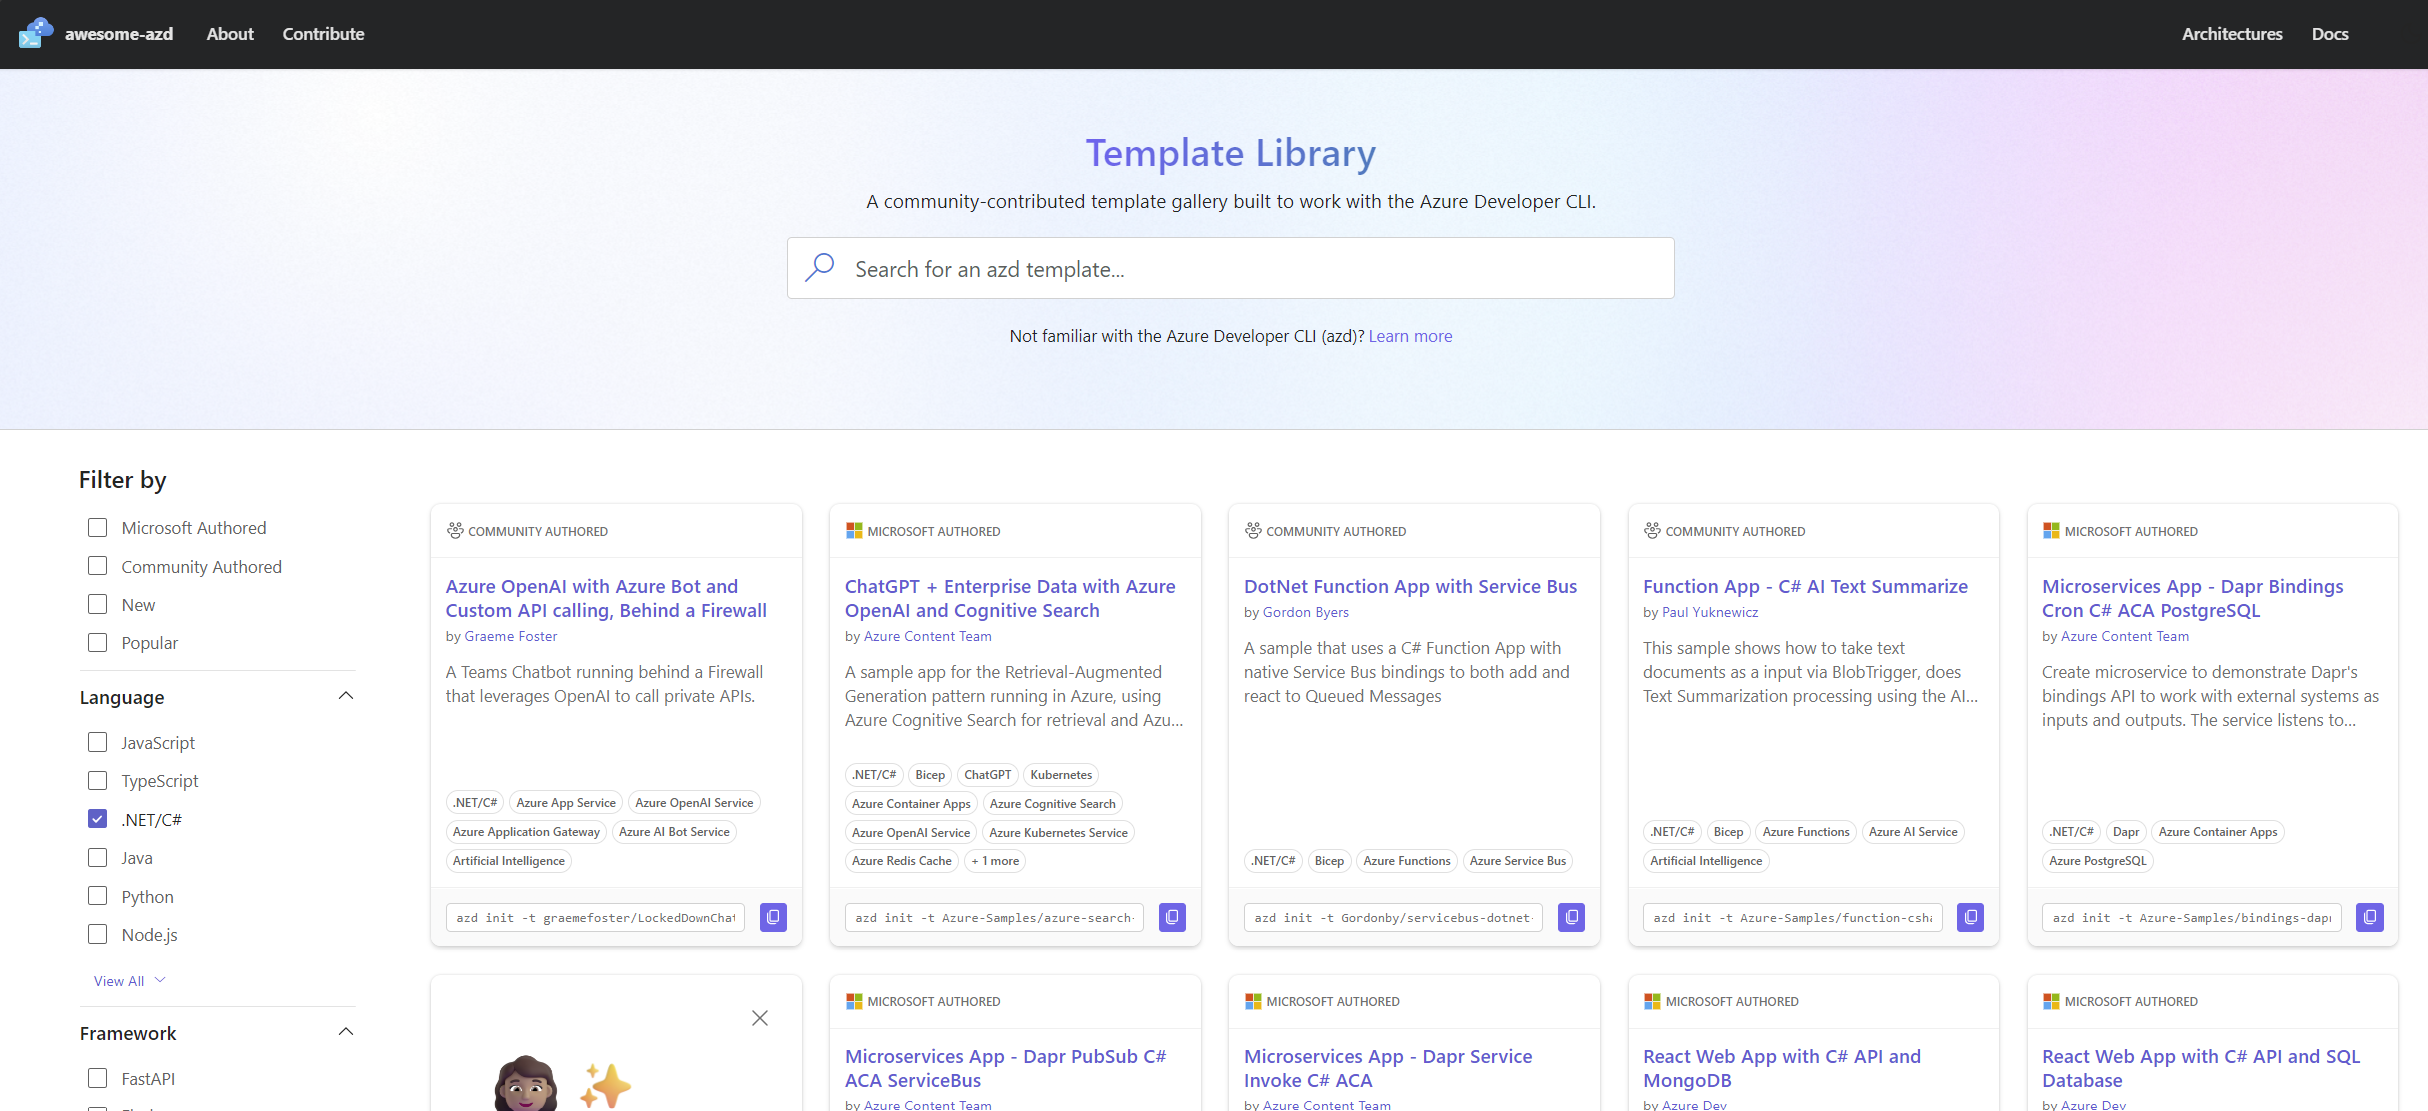
or run the following command:
azd template list

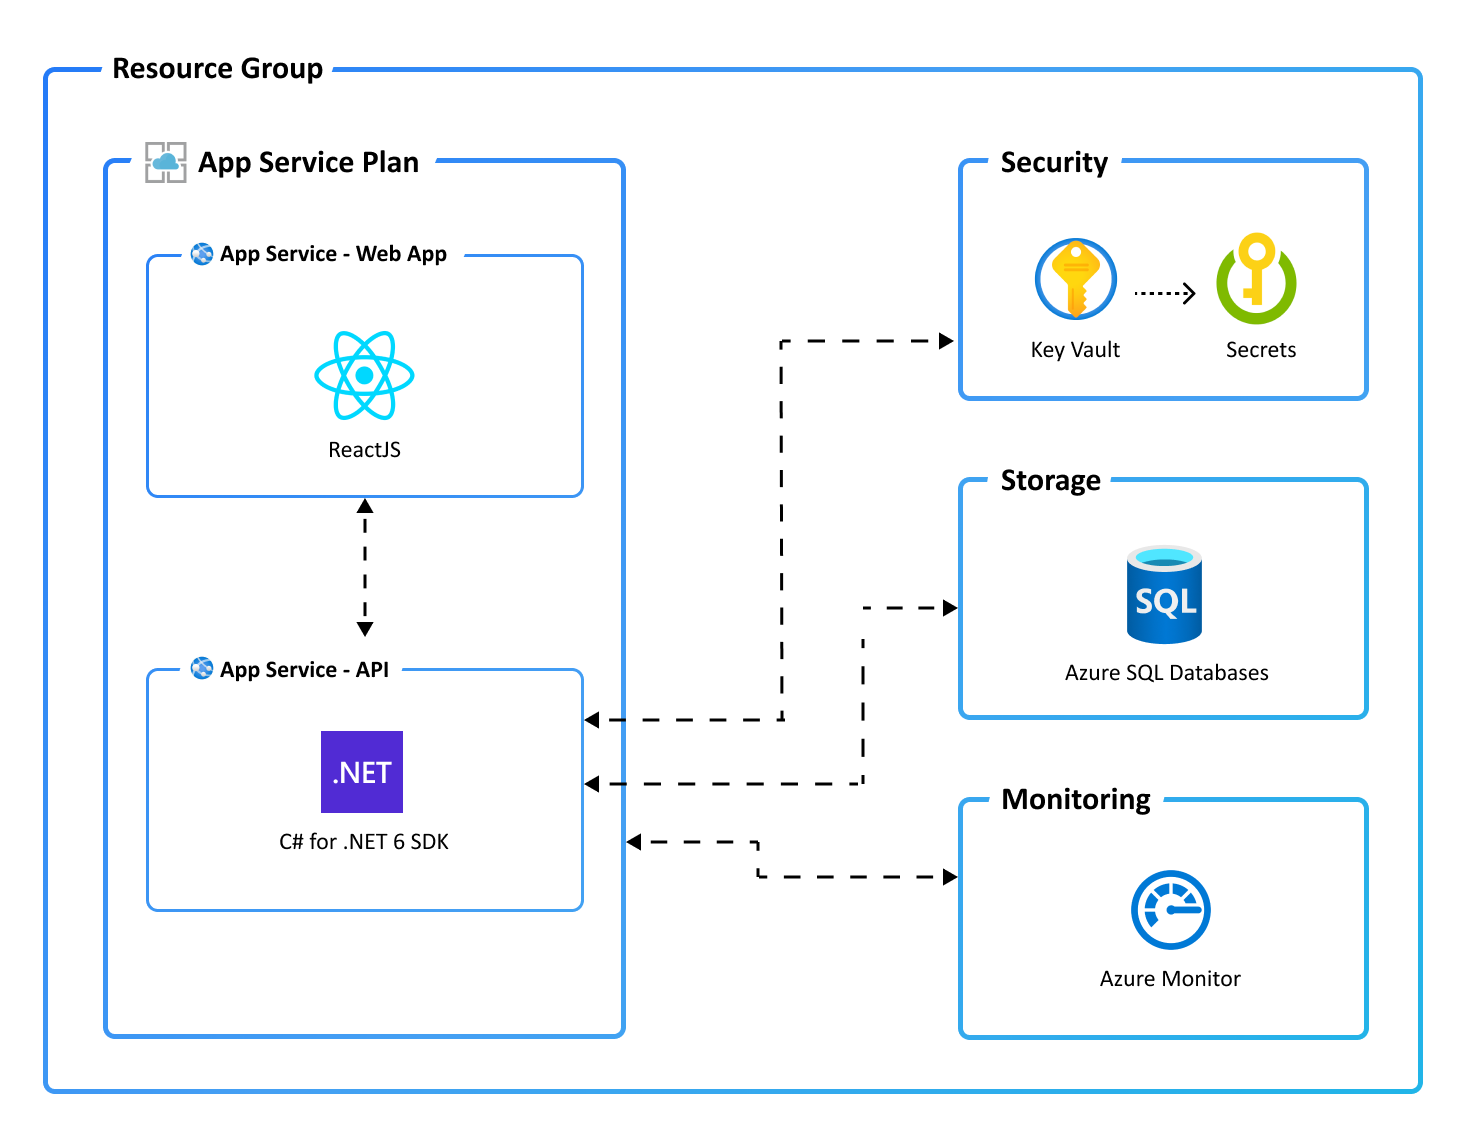
I am going to attempt to use the following template: https://github.com/Azure-Samples/todo-csharp-sql which is described as:
A blueprint for getting a React web app with a C# API and a SQL database on Azure. The blueprint includes sample application code (a ToDo web app) which can be removed and replaced with your own application code. Add your own source code and leverage the Infrastructure as Code assets (written in Bicep) to get up and running quickly.
Iam going to follow the instructions in the README here and make write down what I do and find as I go.
Steps I took
- Ensure I have all the Prerequisites install on my machine
- Regarding
Node.jsI opted to install the latest version 20.8.0
- Regarding
-
Log in to azd:
azd auth login -
Make a new directory for
todo-csharp-sqland navigate to it:azd init --template Azure-Samples/todo-csharp-sql -
I was prompted to enter a new environment name and as I didn’t totally understand what it was asking. I entered
?and the following was displayed:
- I entered:
todo-csharp-sql-devas now it was clear that I may want more than one environment in Azure such asdev,testandprodfor example.
- I entered:
-
After this I got a successful message:
SUCCESS: New project initialized! -
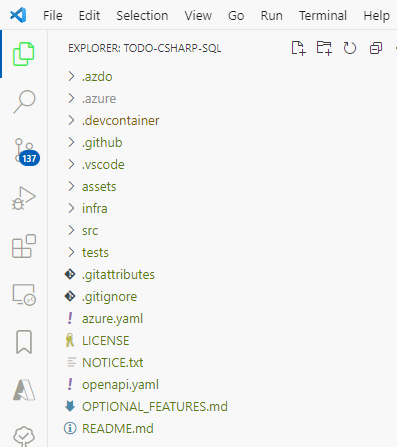
I then opened the folder I made earlier in VSCode and could see a list of all the files locally that were created by the template:
-
I decided to push these to a new GitHub repository I just created so I can revert anything that I might break along this journey.
-
Next I ran the following command to provision everything in Azure:
# Provision and deploy to Azure azd up -
Hopefully I end up with this:
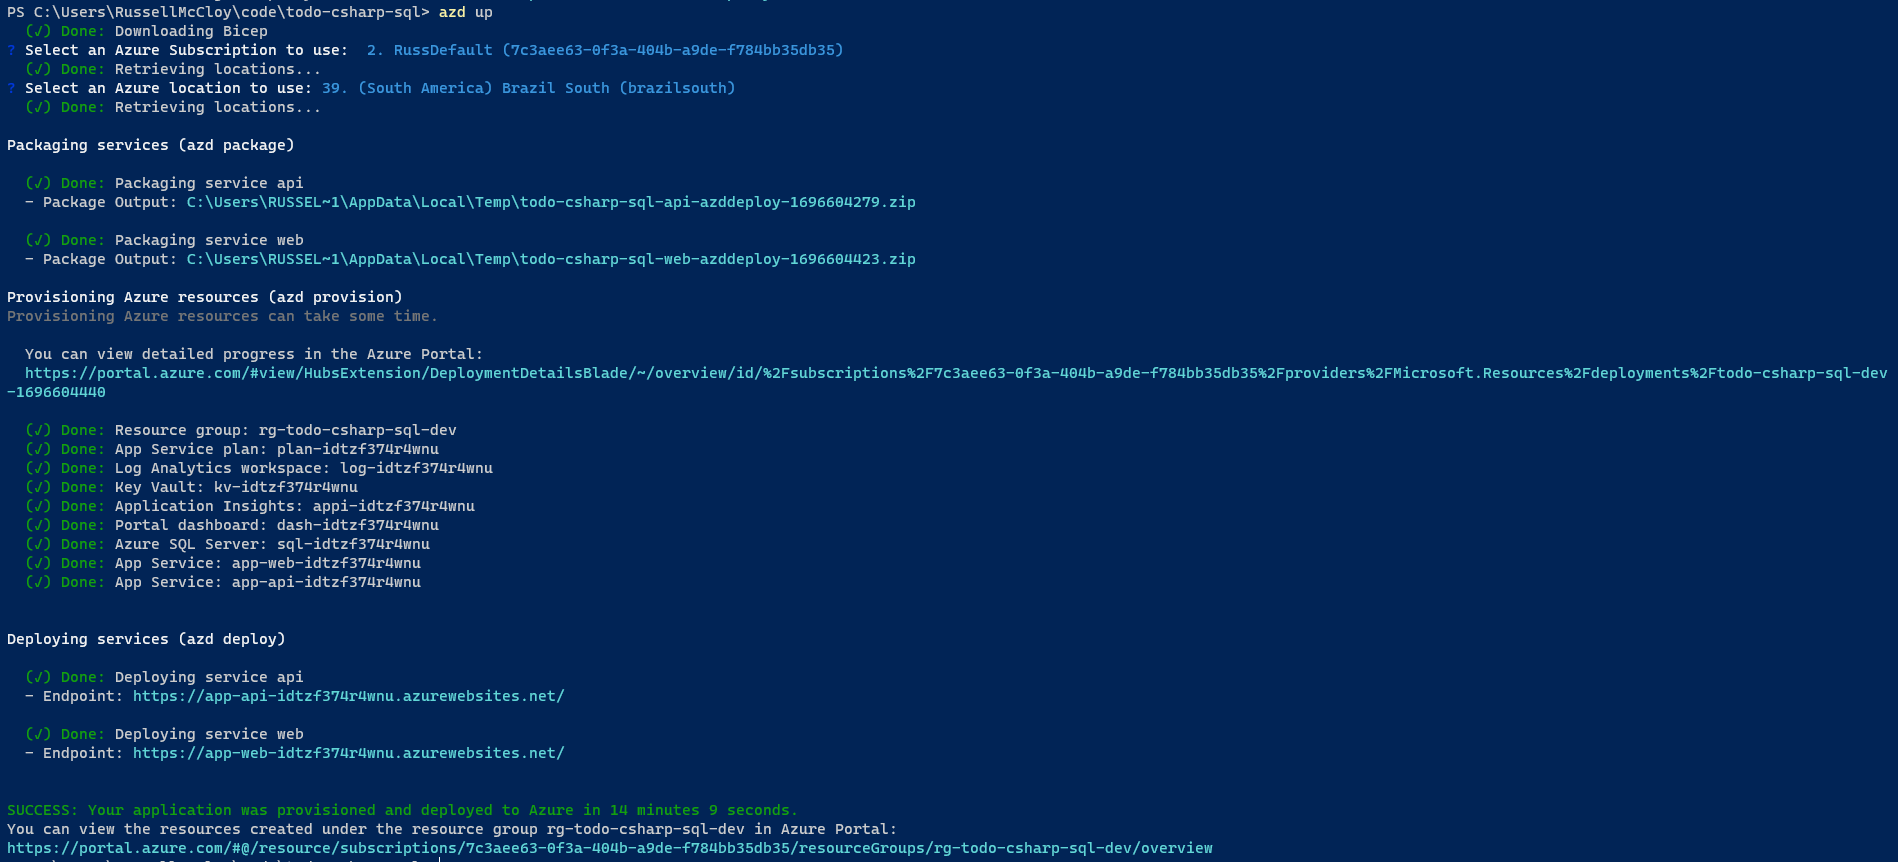
- I was then prompted for the following:
- Azure subscription
- Region - I put it in Brazil South as that is where I am sitting now
After that, everything was packaged up into zip files and deployed. This took about 15 minutes
-
If I look in Azure I can see all my resources:

-
Then I looked at the API that backs the website:
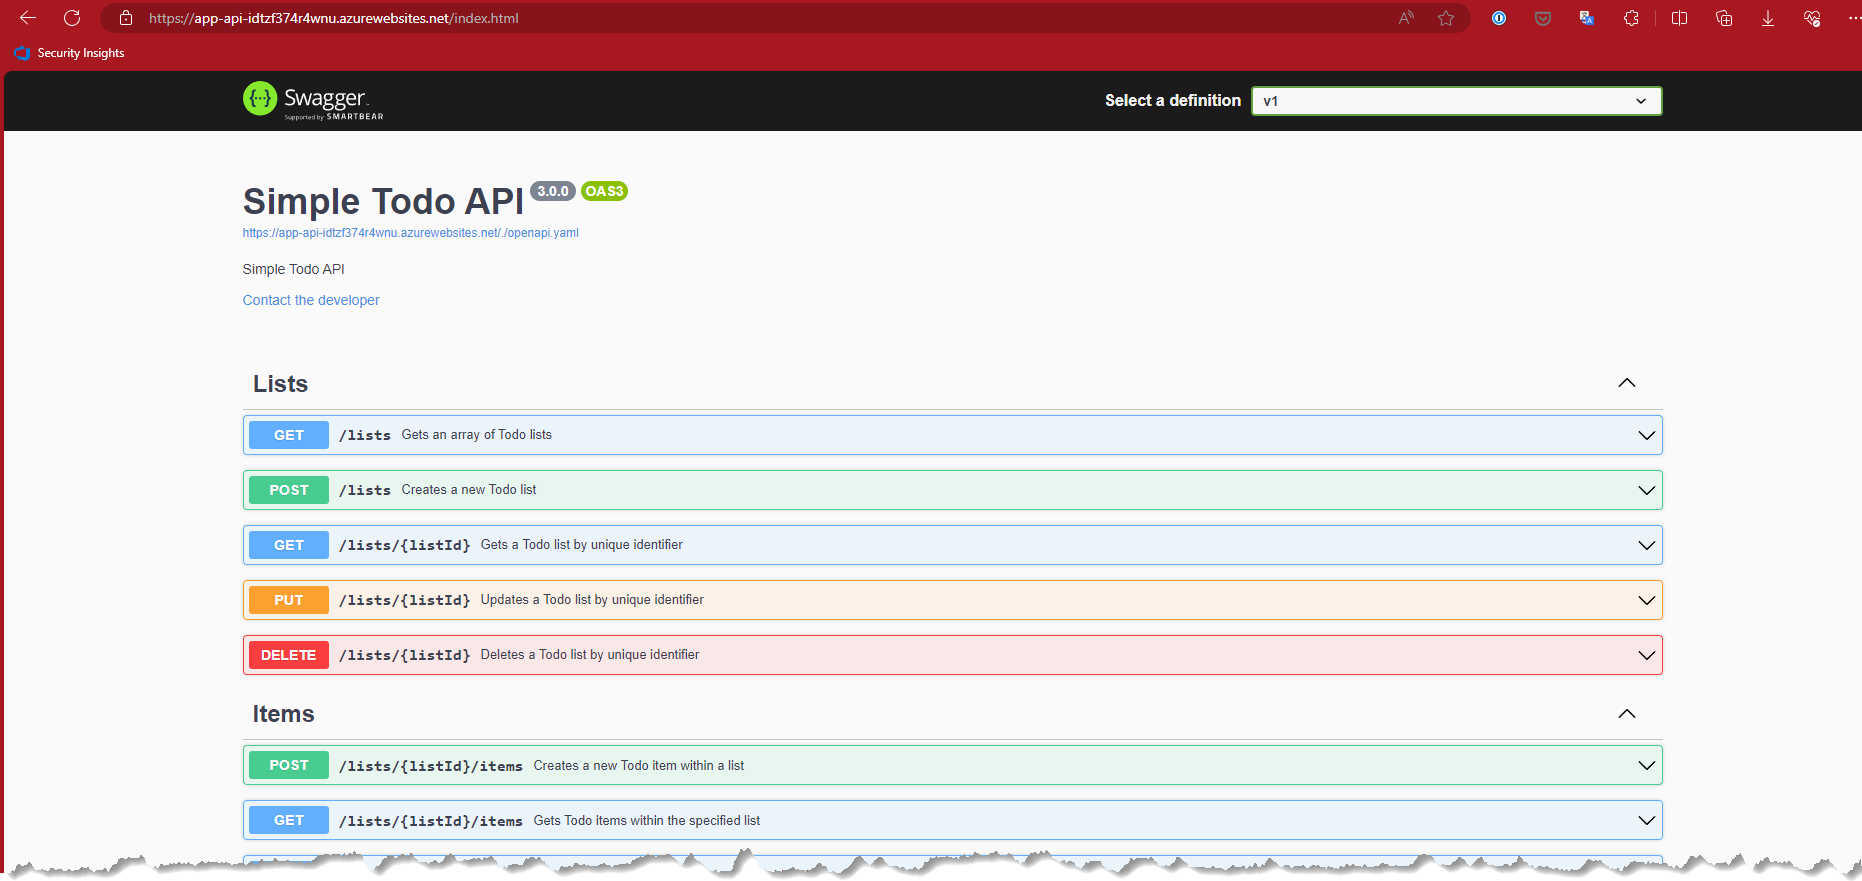
-
and then the website its self:

- As you can see, I even added a
TODOitem expecting things to fail and everything worked as expected 😲
Next Steps
Ok so that was a very nice experience but I don’t want to ever really deploy from my local computer straight to Azure. I would prefer to deploy using CI/ CD.
So next, I will attempt to do this whilst still following the instructions here
All azd templates include a default GitHub Actions and Azure DevOps pipeline configuration file called azure-dev.yml, which is required to setup CI/CD. This configuration file provisions your Azure resources and deploy your code to the main branch. You can find azure-dev.yml:
- For GitHub Actions: in the
.github/workflowdirectory. - For Azure DevOps: in the
azdo/pipelinedirectory.
So here we go, let’s try it:
-
I will run the following command:
azd pipeline config- During the running of this command:
- I was asked to Authenticate to GitHub
- I was asked to Choose a repository - I chose the existing one mentioned above in this post
- It set up my GitHub action secrets that contained the Azure service principal for example:
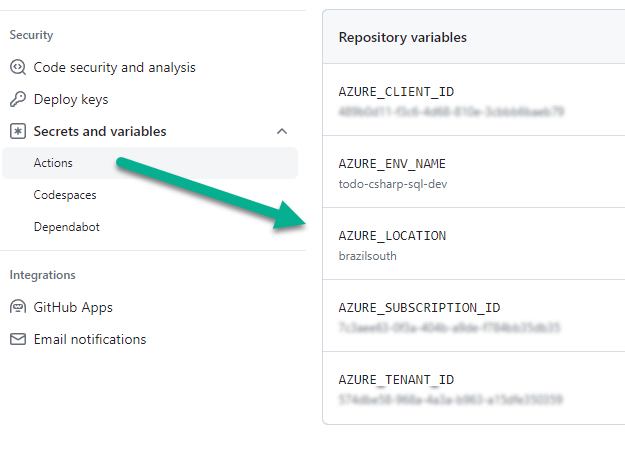
-
here is the actual successful deployment:
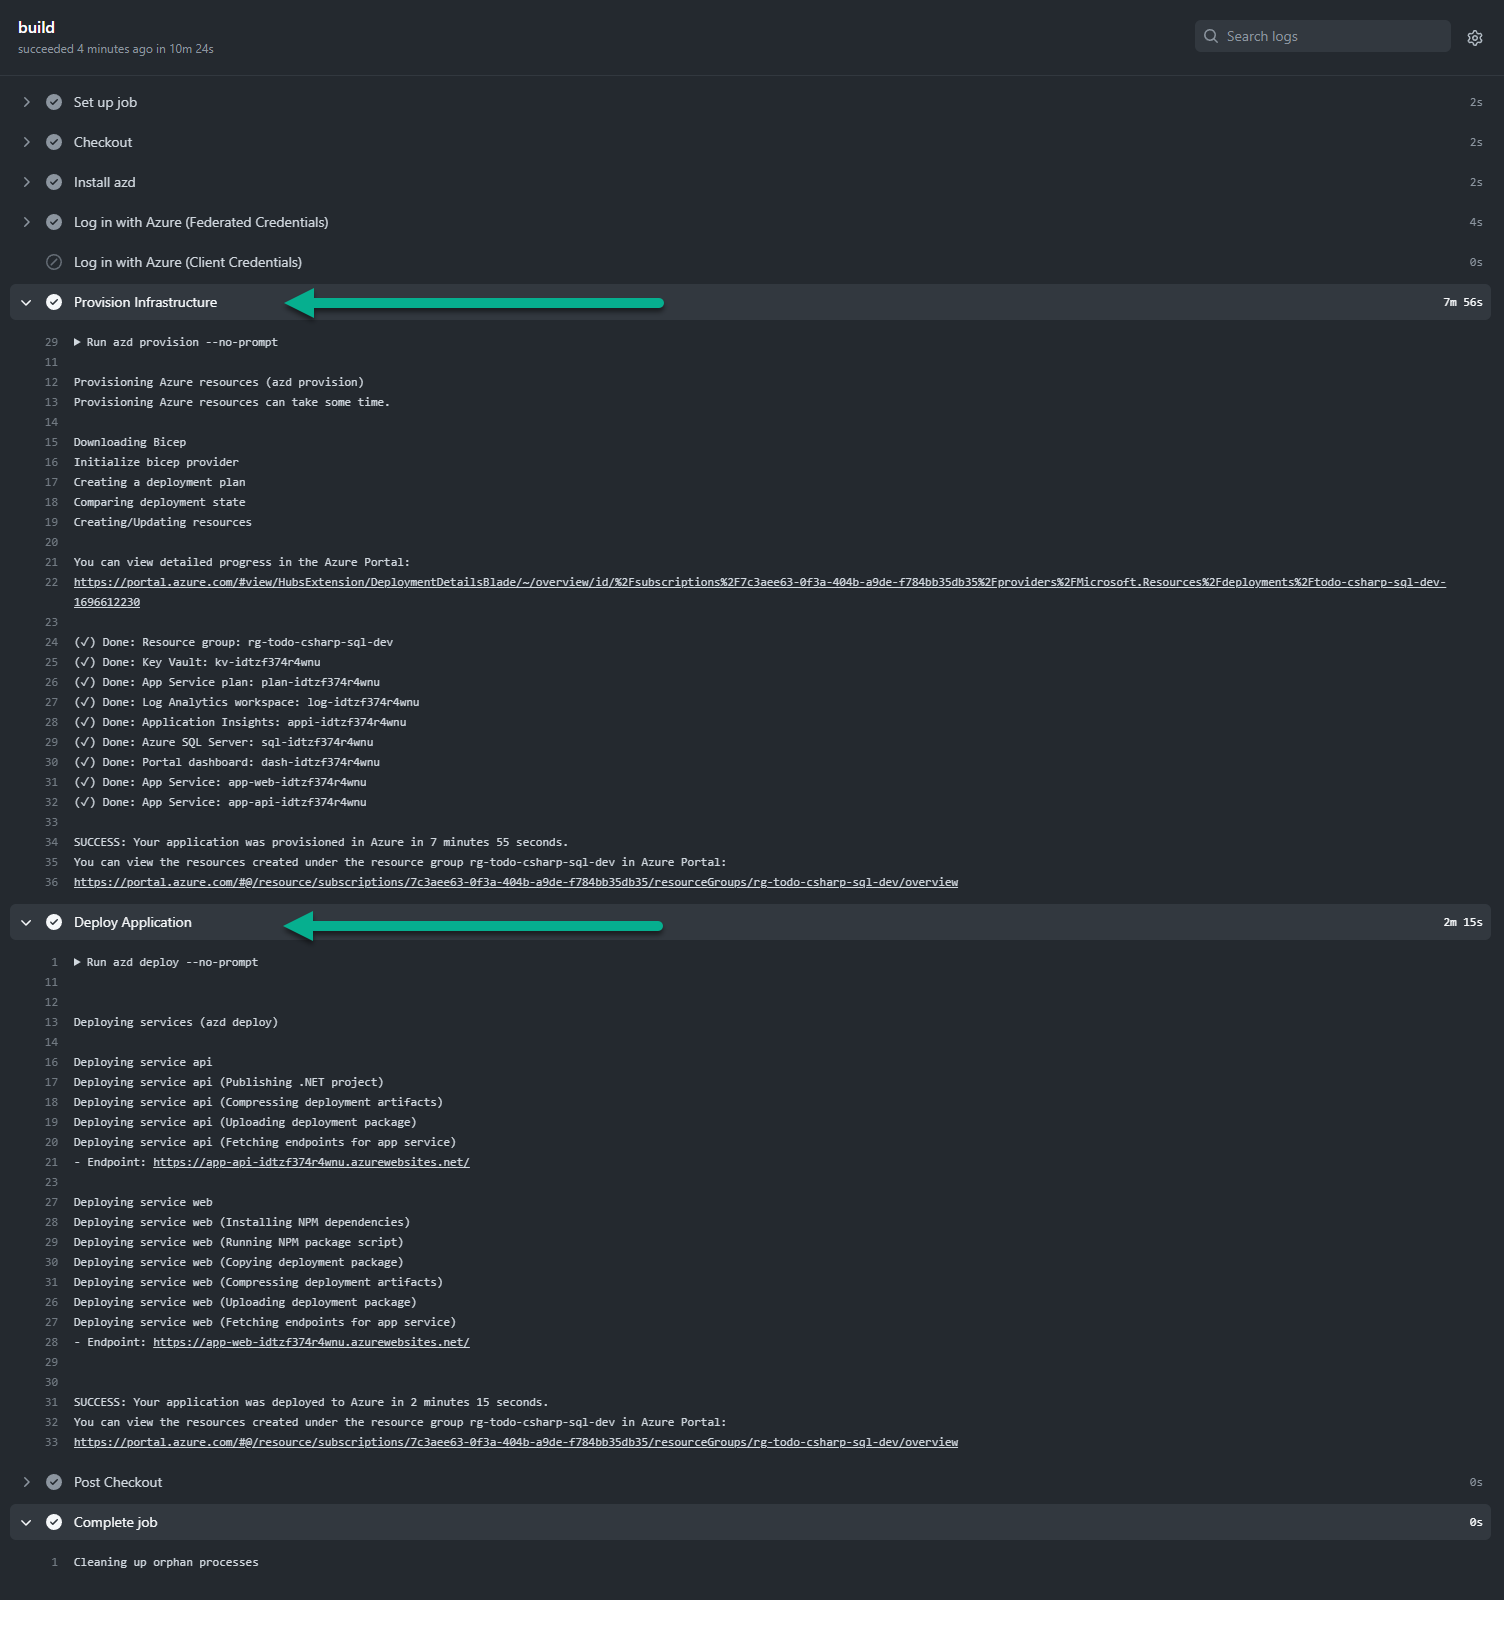
- During the running of this command:
Finally
Tear everything down as this is deployed to my personal Azure subscription and I don’t want to pay for it.
azd down
As you can see in the following picture, all my resources have be deprovisioned:

And in Summary
I don’t think I have ever spent 6 hours on a Microsoft demo without something not working so this is a first 👍👍. From start to finish everything was so easy and worked first time. Next, in Part 2 of this post, I will try and dig into how all of this works and maybe even try to create my own template for the Azure Developer CLI.
Useful Links
- Overview
- Installation
- Azure Developer CLI templates
- CI / CD - Configure a pipeline and push updates
- Monitor your app using Azure Developer CLI (I didn’t get around to trying this step)